RECENT POSTS
Archives
A breakthrough in both heat and chemical resistance, Thermiculite® High Temperature gasket materials are rated for temperatures up to 1832°F and have passed the API 607 fire test. Thermiculite® sealing materials withstand high temperatures in critical service, corrosive environments and are free from oxidation. Click here or contact us for more information.
The FEM Series is undergoing a redesign to enhance its appearance and add to its capabilities. The new FEM couplings have an increased pressure rating up to 5,000 psi and improved corrosion resistance with zinc nickel plating. The 3/8″ and 1/2″ sizes will be available in November with 1/4″, 5/8″, 3/4″ and 1″ to follow.
Learn more here.
Parker hydraulic hose assemblies with PTS ID numbers can now be ordered online from parker.com and delivered to you. Click here to get started today!
Tuesday, October 20th @ 10:00AM
Requirements and Solutions for Machine Safety – Register Here
This training will provide a general overview of machine safety requirements pertaining to lockout and alternative methods of hazardous energy control as outlined by the American Society of Safety Engineers and the American National Standard Institute. The training will focus on fluid power applications found in various industries, along with an introduction to safety audits and risk assessments. Specific “Safety by Sidener” abatement solutions for hazardous energy control will be presented, followed by a review of related products that include:
- Sidener Hydraulic Safety Valves, electrical and manual solutions for hydraulic blocking and energy isolation requirements
- Parker Safety Exhaust Valves, electrical and manual solutions for pneumatic energy isolation requirements
- Euchner Safety Switches, Gate Boxes, Relays & Control Systems
- Pinnacle Safety Light Curtains, Safety Mats, Safety Controllers and Control Systems
Thursday, October 22nd @ 10:00AM
Combine Fluid Power Safety & Connectivity for Increased Productivity
– Register Here
Until recently, safety and networking were viewed as expensive mandates that added more cost than value. Today, enlightened Controls Engineers leverage their knowledge of safety and networking technologies to design fluid power circuits that mitigate downtime and deliver a faster ROI.
- Common fluid power hazards
- SRP/CS and safety-rated products
- Control-reliable, pressure zoning, LOTO “Alternative Methods”
- Pneumatic and hydraulic devices (SRP/CS & Safety Rated) available for safety circuits
- Leveraging Parker’s ISO H Series for prognostics and diagnostics
Tuesday, September 22, 2020 by TechConnect Team

In our first post of this series, Troubleshooting Fluid System Connection Leaks, we gave an overview of how to troubleshoot a system that’s leaking and the areas to focus on. Now that the leak has been located and the probable causes are narrowed down, what should you do to fix it? In this post we’re going to take a deeper dive into what “A Leakage From a Tube or Swivel Nut” means and what you can do about it.
When it comes to leaks, you should make no assumptions. It is worth your time to at least consider every possible cause before jumping in and fixing a leak. Often, only the symptom is what is most visible, and if a fix is completed based solely on that, the true cause could be missed which can lead to more costly leaks and fixes in the near future.
In our first post, we outlined the following probable causes for a leakage coming from a tube or swivel nut as:
- Inadequate Torque/Improper assembly
- Misalignment or Improper Fit
- Missing or Damaged O-ring
- Braze Overflow on sealing surface
- Extruded O-ring
- Damaged Fitting
At this point you have narrowed your leak issue to the area around the nut in your connection. Now how do you determine which of the above is the root cause? You will want to investigate all of these probable causes, as in some cases, you may have more than one problem. Since the system is already being investigated, don’t just assume that you found the root cause before eliminating every probable cause. To get the most accurate picture of the leak cause, you may find it helpful to take the connection apart where the leak is located. As always, use proper safety measures and be sure to lockout and power down the equipment. If you are not sure what safety measures are needed, ask someone for guidance.
Note: This post will be addressing leaks specifically from a tube or crimp nut. If you think the leak is coming from the locknut on an adjustable port end, you will want to read our previous post on port leaks instead.
Inadequate torque/improper assembly
A certain amount of torque is required to provide enough clamping load at the joint to resist the forces of internal pressure and vibration loosening. The Parker Catalog 4300 provides the recommended torque for each thread type and size in our Assembly/Installation section.
Pro Tip: For O-ring Face Seal (ORFS) components, keep a close eye on assembly torque. ORFS components will show a rapid rise in torque when the sealing surfaces make contact. Do not misinterpret this as reaching correct the assembly torque.
Reference our detailed assembly instructions in the Assembly/Installation section in the Parker Catalog 4300. Assembly instructions and videos can also be found on TFDtechConnect.com.
Misalignment or improper fit
A critical step in the assembly process is aligning the tube end with the connecting fitting face. If a tube is not properly aligned with the sealing surface of the fitting before tightening the nut, a leak path will be created. The proper procedure is always to align the tube and connecting sealing surface of the fitting properly before tightening the tube nut. Look at your connection. If the tube looks like the one on the left side of Figure 1, you have a misaligned tube. If the tube looks like the one on the right side, then you have an improper fit.

Figure 1. Incorrect alignment and fit
For a mis-aligned tube, the tube will need to be properly bent more so that it is aligned with the fitting, rather than making up the gap with force. For an improper fit, it is the same situation as a misaligned tube, you need to correct this. In most cases this will involve re-making the tube because it is not long enough to make the connection.
If there is a gap between the fitting face and the connecting tube (due to mis-alignment or improper fit), a leak path will be created, as this is your sealing surface. Do not rely on the tube nut to make up this gap; by using the nut to close the gap you are only hiding the problem, not eliminating it. If the tube alignment or fit is not correct, you may be causing more harm than good by proceeding with assembly without properly correcting the issue.
Mis-alignment and improper fit can affect two things:
- the assembly torque
- the integrity of your connection
If you are using your tube nut to correct the gap between the tube and the fitting, you are putting stress on your connection. If the connection is not aligned or fitted properly prior to tightening, most of the torque will be used up in achieving alignment and may not be enough to create the adequate clamping load needed to properly assemble the connection.
When properly aligned, the tube nut should be able to thread on completely by hand before wrench tightening. We can’t stress this enough, do not use tightening of a tube nut for pulling a misaligned joint together, this will put an undesirable strain on the joint, leading to leakage or, in extreme cases, shearing the fitting. We will be releasing another post soon about the failure modes of misalignment and improper fit, as these two problems can lead to very dangerous system failures.

Figure 2. Proper alignment
Missing or damaged (extruded or pinched) O-ring
Be careful, this section talks about O-ring damage. O-ring damage on fittings with a tube or crimp nut are most commonly going to be O-ring Face Seal (ORFS) fittings. If you are experiencing O-ring issues on a non-ORFS part, you may actually be looking for our previous post where we detail port leaks. If you do in fact have a port leak, you will want to read that post instead, as this post is only talking about O-ring issues on an ORFS fitting.
There is a large range of what a damaged O-ring could look like. What you are looking for is anything that looks out of the ordinary. Are there pieces missing? Is it frayed? Does the O-ring look pinched and/or deformed? Look very closely at it, as the damage might be small. Figure 3 illustrates obvious and not so obvious damage to the an O-ring.

Figure 3. Damaged O-rings
For O-ring Face Seal (ORFS) fittings, one common form of damage is an extruded O-ring. When properly assembled, ORFS fittings make metal to metal contact outside of the O-ring groove, hence holding the O-ring captive. If there is a gap between the metal surfaces, then excessive internal pressure can force the O-ring material through the gap and even more so if the O-ring is softer than the recommended 90 durometer hardness. The O-ring can also be extruded if an attempt is made to bleed off air by “cracking” an O-ring sealed joint.
Pro Tip: Parker’s Trap Seal in Seal-Lok ORFS fittings helps prevent O-ring extrusion with its special trapazoidal shape that fits securely into the O-ring groove, reducing O-ring fall-out and extrusion issues.
Extruded O-rings will need replaced, but before you do that first find the root cause. Use the following items as a checklist when examining the system to pinpoint what caused the O-ring extrusion.
Check for:
- Proper alignment
- System pressure surges in excess of 133% of the fittings working pressure
- O-ring of proper hardness
- Proper torque
Another possible root cause is that the O-ring is missing and was forgotten during assembly. If the O-ring fell out during shipping or assembly, it may not have been an obvious error. If you have an O-ring groove with no O-ring in it, then a seal cannot be made. In figure 4, there is an example illustrating where the O-ring is supposed to be located but is missing. If you suspect an O-ring is missing or are not sure if one is missing, check with the fitting manufacturer to see if one should have been used.

Figure 4. O-ring groove missing the O-ring
When replacing a damaged or missing O-ring, be sure to select the correct replacement. Just because an O-ring fits, does not always mean it’s the correct one for the job.
Three critical items to consider with O-rings are:
- Size – Never assume that the O-ring is the correct size. If it’s too small or too large the O-ring won’t do its job.
- Material – You may need a specific material type for your application. You wouldn’t want to use a material only to find out afterwards that it is incompatible with your system media and/or temperature.
- Durometer (hardness) – Softer O-rings have a higher tenancy to get damaged or be extruded out of the fitting. In most cases 90 durometer is needed.
If you are unsure on what O-ring to use, a fitting manufacturer will be able to point you in the right direction.
Pro Tip: If you find yourself frequently replacing an O-ring, it may be that you didn’t find the true cause. In some cases, a damaged O-ring is a symptom, not the cause. This is why we encourage you to investigate all the probable causes listed above, ensuring your investigation was thorough enough to find the true cause(s).
Braze overflow on sealing surface
Brazing is a difficult practice to perform. One of the issues that can come up with brazing is braze overflow on the sealing surface. This issue is most apparent with leaks coming from the tube nut, as the sealing surface is being obstructed. Overflow can occur on the sealing surface because of the location of the heat when the ring melts. Braze alloy tends to flow in the direction of higher temperature. As soon as it is evident that the ring is melting, the heat should be relocated to the small diameter end of the sleeve to encourage the alloy to flow through the joint. If you discover there is braze overflow, you will need to remove the affected sleeve and re-braze a new one in its place prior to assembly.
The next post in this series will be specifically addressing brazing issues, so stay tuned.

Figure 5. Braze overflow on sealing surface
Damaged fitting
What does a damaged fitting look like? Some fitting damage is easy to spot, like a large crack or scratch. In some cases, though, minor damage may be missed or overlooked. Take a critical eye to your fittings, paying special attention to the sealing surface. Even a small scratch in the right location can prevent a seal from forming. If there is any damage to the sealing surface, you may need to replace the fitting. Figure 6 points out where the sealing surfaces are and where you will want to pay special attention. The ORFS sealing surfaces are where the flanged or brazed tube and ORFS O-ring and fitting face come in contact. The 37-degree flare sealing surfaces are where the flared fitting nose and the flared tube come in contact.

Figure 6. Sealing Surface Locations
Again, obvious answer, if the fitting is damaged, replace it with a good quality fitting. Fittings often get nicks and scratches during handling or storage if they are not properly protected. Damage on a sealing surface or on threads is irreversible. It is best practice to examine a fitting before assembly to ensure that no damage happened during shipping or handling. Looking the fitting over first will prevent headaches in the future.
Always keep any shipping caps on fittings until they are installed. This practice helps to prevent damage during storing and handling. Be sure to be careful when assembling fittings as damaged often occurs in the process of assembly.
Congratulations to this month’s winner, Alan Janak!
Want to win a $50 American Express gift card? We’re giving away one each month for the rest of the year! Just follow us on Facebook, Twitter, Instagram or LinkedIn and you will automatically be entered to win. Follow us on multiple networks to increase your chances to win!
OMLER Pneumatic Sand Decoring Hammers combine high quality with performance to remove sand or ceramic from aluminum and grey iron castings. Several hammer models are available to fit your application. Exotic is Omler’s exclusive US distributor and offers in-stock inventory as well as repair services and application assistance.
What Makes OMLER Hammers Unique?
- Patented Technology
- Lightweight
- Low Friction
- Protected Sensor
- Available Frequency Monitoring
- Variable Frequency Control
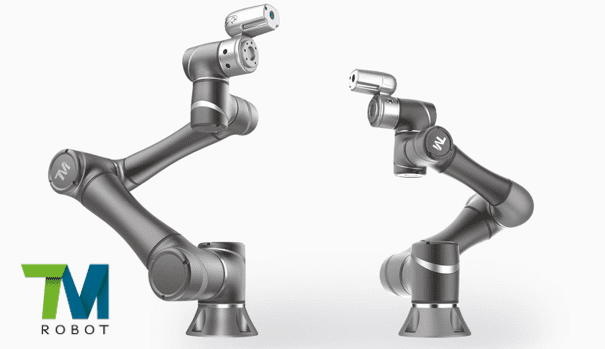
Techman Collaborative Robots are designed to work alongside humans and are known as the safest and easiest to use because of their advanced features. From product testing, assembly, and packaging, to machine loading and unloading, TM Robot can simplify the production process of your entire manufacturing line, and greatly optimize production efficiency.
- Built-in Vision – Unlike traditional Collaborative Robots, Techman Robots have built-in sensors which are able to read barcodes / QR codes, recognize colors & match patterns / shapes.
- Easy to Program – No coding skills are needed. They feature a simple to use interface with graphic and flow chart based HMI.
- Small & Lightweight – Can easily be carried over to different machines within a plant and programmed easily for different tasks.
- Safe – The robot stops immediately if it senses anything in its path.
- Capable – Lifts / Moves up to 30 pounds.
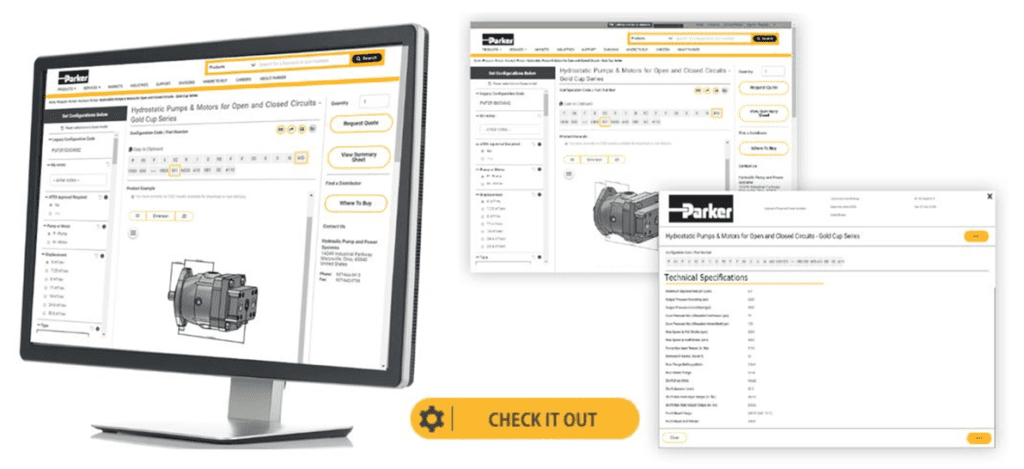
Need a hydraulic pump solution? Now you can dream it, design, and configure with product precision and a quicker specification process using Parker’s Pump and Motor eConfigurator. The new Gold Cup eConfigurator has intelligence built-in so you can easily customize a hydraulic pump solution tailored to your unique needs.
Key features of the new eConfigurator include:
- Additional Details & Specifications
- Enhanced Model Codes
- Improved Collaboration
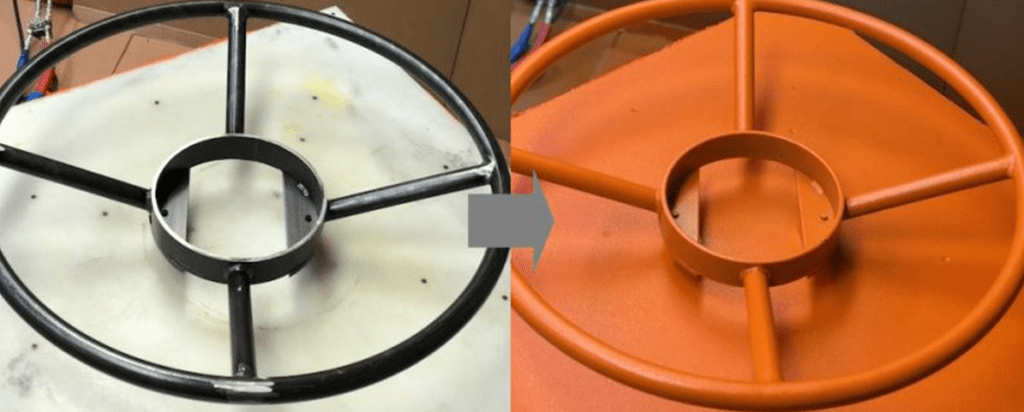
Want to significantly reduce wasted & damaged material? Exotic Automation & Supply’s In-System Damage Protection, ISD, uses a high grade neoprene foam rubber, coated with a high performance grade polyurea to prevent damage to Class A surfaces. It has been proven to save customers over $300,000! Contact us today to learn more.
Tuesday, September 29th @ 10:00AM
Applying Rubber & Plastic Solutions for Industry – Register Here
With all the trade names and abbreviations it’s hard to tell the difference between Plastics and Compounds for your industrial applications. We will help make sense of the Industry Jargon and show you what products are compatible for your application. We will focus on weight reduction in substituting high grade polymer material instead of metal and the resulting benefits.
- Polyolefins (UHMW, Polypropylene, Polyethylene, etc.) – Understanding their industrial benefits
- Rubber – Examples of common manufacturing environment applications
- Results of high grade polymers
Wednesday, September 30th @ 10:00AM
Transair Aluminum Piping Basics – Register Here
Transair’s lightweight components and quick-connect interlocking design allow for easy and immediate layout modifications and require no need to thread, solder, or glue pipe. In this course, we will cover the how to properly size your system, the differences between aluminum and black pipe and potential cost savings.
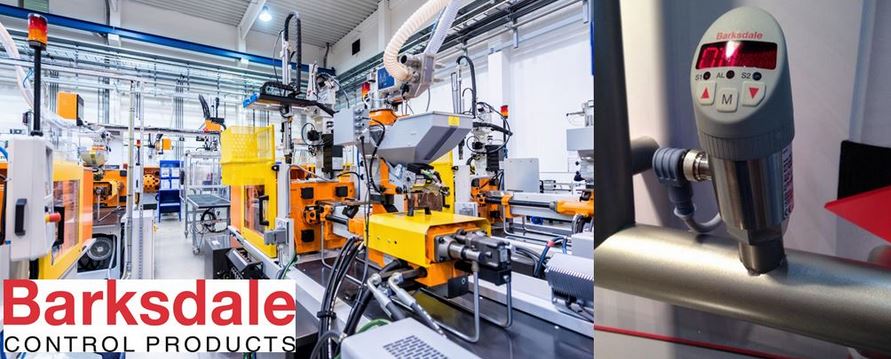
Barksdale BPS3000 Electronic Pressure Switches
Barksdale’s BPS3000 Electronic Dual Pressure Switches combine three discrete components (dual pressure switch, pressure transducer, and digital pressure gauge) into one compact package. The BPS300 is available in three configurations:

Parker Introduces New EC02 Digital Electronic Control Module
Parker’s Hydraulic Pump and Power Systems Division unveiled its newest device, the EC02 Digital Electronic Control Module for GOLD CUP® pumps. With unrelenting performance and reliability, the EC02 has the
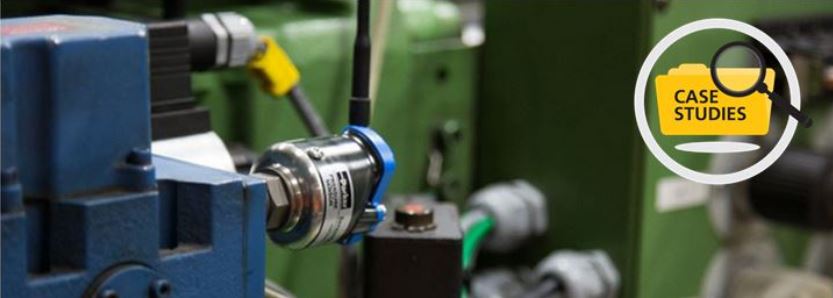
Monitoring Machine Pressure & Temp with SensoNODE
The Problem – An injection molding customer that makes plastic parts for clothes washers had no convenient way to monitor pressure levels for its 50+ machines. Diagnosing a pressure issue
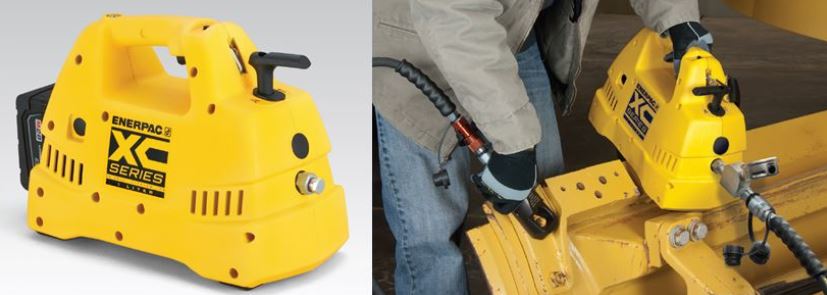
Enerpac’s XC-Series Cordless Pump
Enerpac’s XC-Series cordless pump is ideal for jobs that require a combination of portability, speed, and safety. These cordless pumps are perfect for remote locations without access to power, but
What Creates Noise in Hydraulic Systems?
What creates noise in hydraulic systems and why is it important to eliminate it? Noise in hydraulic systems is generated primarily by the mechanical workings of the pump and fluid
Control Reliable Hydraulic Safety Valves
Exotic Automation & Supply created two types of Hydraulic Safety Valves to cover all your application needs! Our Control Reliable Energy Isolation Valve functions as a two position 3-way hydraulic

We Have the Most Hoses & Fittings In-Stock!
As one of a small handful of Parker’s Certified “Connector Technical Centers “ in North America, Exotic Automation & Supply stocks more Parker Fluid Connector Inventory than any of our
Exotic Automation & Supply Appointed Distributor Partner for Barksdale Control Products
New distribution agreement sets both companies up to expand in fluid control & measurement. August 16th, 2017 – Farmington Hills, MI – Exotic Automation & Supply, a leading manufacturer

Exotic Automation & Supply is now Offering Free Product Training at 4 Different Locations
We are proud to offer free training & development classes at 4 of our Michigan locations! Space is limited so please register today by emailing [email protected] with the names of

Graco University Product Safety Training
Graco is offering a free online safety training course which covers safety hazards associated with using Graco equipment. Click here to begin.

Parker Valves Shipped in 24 Hours
Timing is key… That’s why we developed the Fluid Control Ship Program to meet your specific time-critical requirements with Parker’s best-in-class products, all available within 24 hours for quantities of

Video: How to Mount a Hydraulic Damper
Check out this quick 3-minute video from ACE Controls to learn how to properly and safely mount a hydraulic damper. Whether used as drive compensation or safety elements, the retraction


